Essential Steps for Tile Installation: Achieve a Flawless Finish
- Dhimiter Rrera

- 9 hours ago
- 3 min read
Installing tiles can transform any space, adding elegance and durability. However, achieving a flawless tile installation requires careful planning, precise execution, and attention to detail. Whether you are tiling a bathroom, kitchen, or floor, following the right steps will ensure a professional-looking result that lasts for years.
Key Steps for Tile Installation
Before starting, gather all necessary tools and materials: tiles, adhesive, grout, spacers, a tile cutter, a level, and a trowel. Preparation is crucial to avoid common mistakes.
1. Prepare the Surface
The surface must be clean, dry, and level. Remove any old flooring, dirt, or grease. If the surface is uneven, use a leveling compound to create a smooth base. This step prevents tiles from cracking or shifting later.
2. Plan Your Layout
Measure the area and plan the tile layout. Start from the center and work outward to ensure symmetry. Dry-lay a few tiles to visualize the pattern and avoid awkward cuts at edges. Mark guidelines with a pencil or chalk line to keep tiles straight.
3. Apply Adhesive Correctly
Use a notched trowel to spread tile adhesive evenly on a small section of the surface. Work in manageable areas to prevent the adhesive from drying out before placing tiles. Press each tile firmly into the adhesive, twisting slightly to ensure a strong bond.

4. Use Spacers for Even Gaps
Place tile spacers between tiles to maintain consistent grout lines. This ensures a neat and professional appearance. Remove spacers once the adhesive has set but before grouting.
5. Cut Tiles to Fit
Use a tile cutter or wet saw to cut tiles for edges and corners. Measure carefully and cut slowly to avoid breakage. Smooth rough edges with a tile file.
How much should tile installation cost?
The cost of tile installation varies depending on factors such as tile type, area size, and labor rates. On average, professional tile installation can range from $5 to $15 per square foot. This includes surface preparation, adhesive, tile placement, and grouting.
DIY installation can reduce costs but requires skill and time. Keep in mind that improper installation may lead to costly repairs later. Always budget for quality materials and professional help if needed.
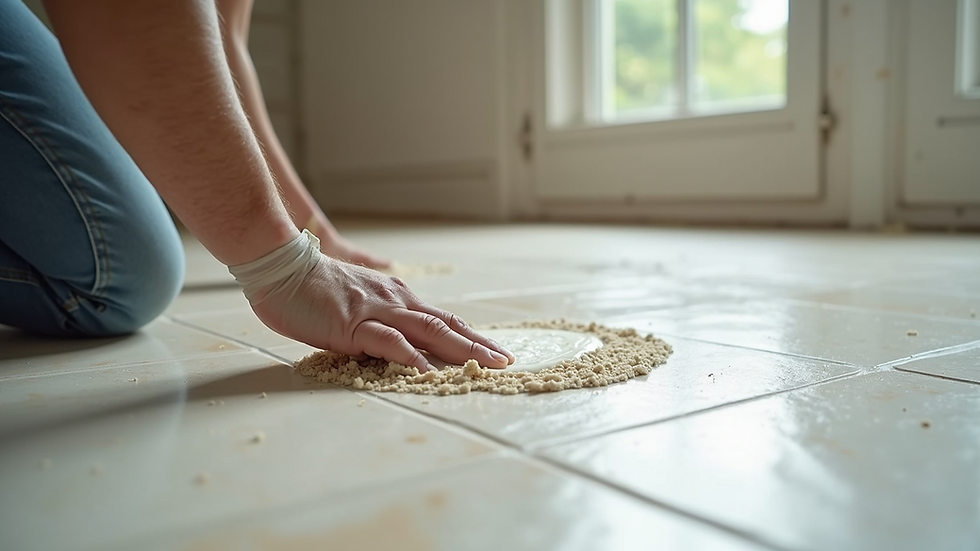
Grouting and Finishing Touches
Once the adhesive has dried, remove spacers and apply grout using a rubber float. Spread grout diagonally across tiles to fill gaps completely. Wipe off excess grout with a damp sponge before it hardens.
Allow grout to cure for at least 24 hours. Then, seal the grout lines to protect against moisture and stains. This step is especially important in wet areas like bathrooms and kitchens.

Tips for Long-Lasting Tile Installation
Choose the right tile for your space. Porcelain and ceramic are popular for durability.
Maintain consistent spacing to avoid uneven grout lines.
Use quality adhesive and grout to prevent tiles from loosening or discoloring.
Seal grout regularly to extend its lifespan.
Clean tiles properly with non-abrasive cleaners to keep them looking new.
Following these steps carefully will help you achieve a flawless tile installation that enhances your space beautifully.
For more detailed guidance, check out this comprehensive tile installation resource.
Enhancing Your Space with Perfect Tiles
A well-executed tile project not only improves aesthetics but also adds value to your property. Whether renovating a small bathroom or installing a new kitchen backsplash, attention to detail in every step makes a significant difference.
By preparing the surface thoroughly, planning your layout, applying adhesive correctly, and finishing with precise grouting, you can enjoy a stunning tile surface that stands the test of time. Remember, patience and precision are your best tools for success.
Start your tile project today with confidence and transform your space with flawless tiles!


Comments